SignalSight lets you build professional landing pages in a few clicks — no code required. Use them in Web2App campaigns to capture clicks on the web, attribute installs in your MMP, and forward events to Meta, TikTok, and other ad platforms.
Note
Every landing page must be linked to a tracker. Create one first, or have an existing tracker ready before you start. For Web2App flows, complete the Adjust or AppsFlyer integration beforehand.
Step 1: Open Landing Pages
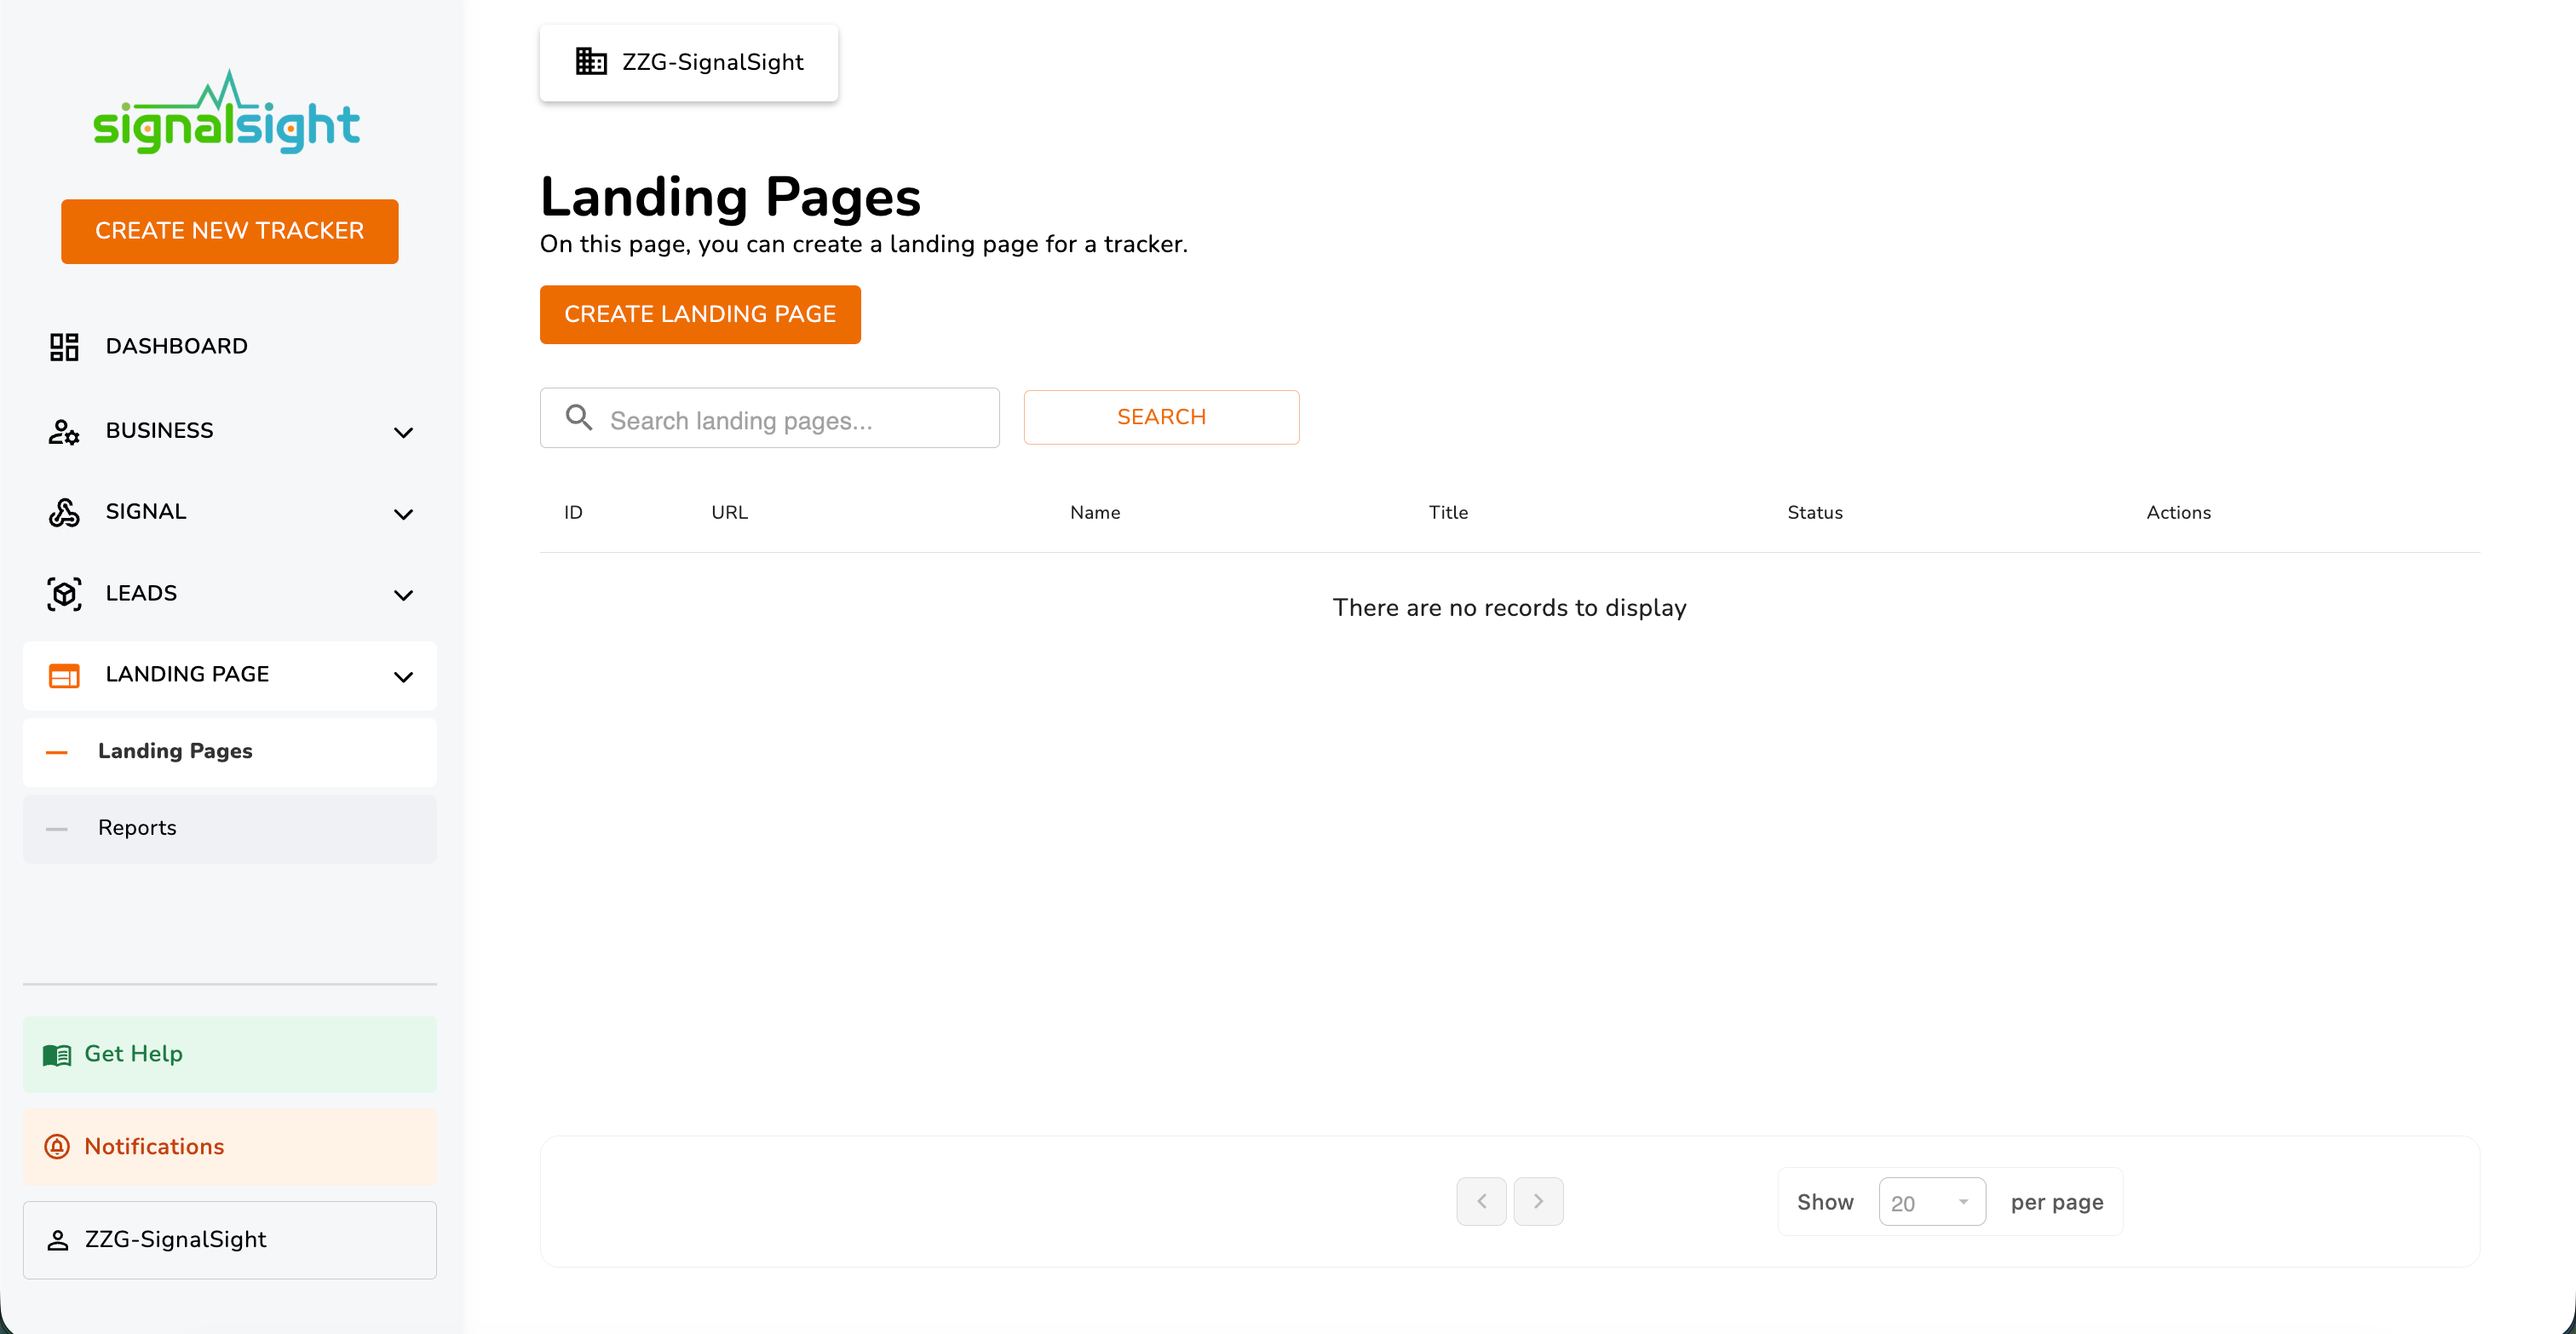
In the left sidebar, expand Landing Page and select Landing Pages. This is your landing page dashboard — here you can see all published pages, search by name, and start a new one. Click the orange Create Landing Page button to open the setup wizard.
Step 2: General Information
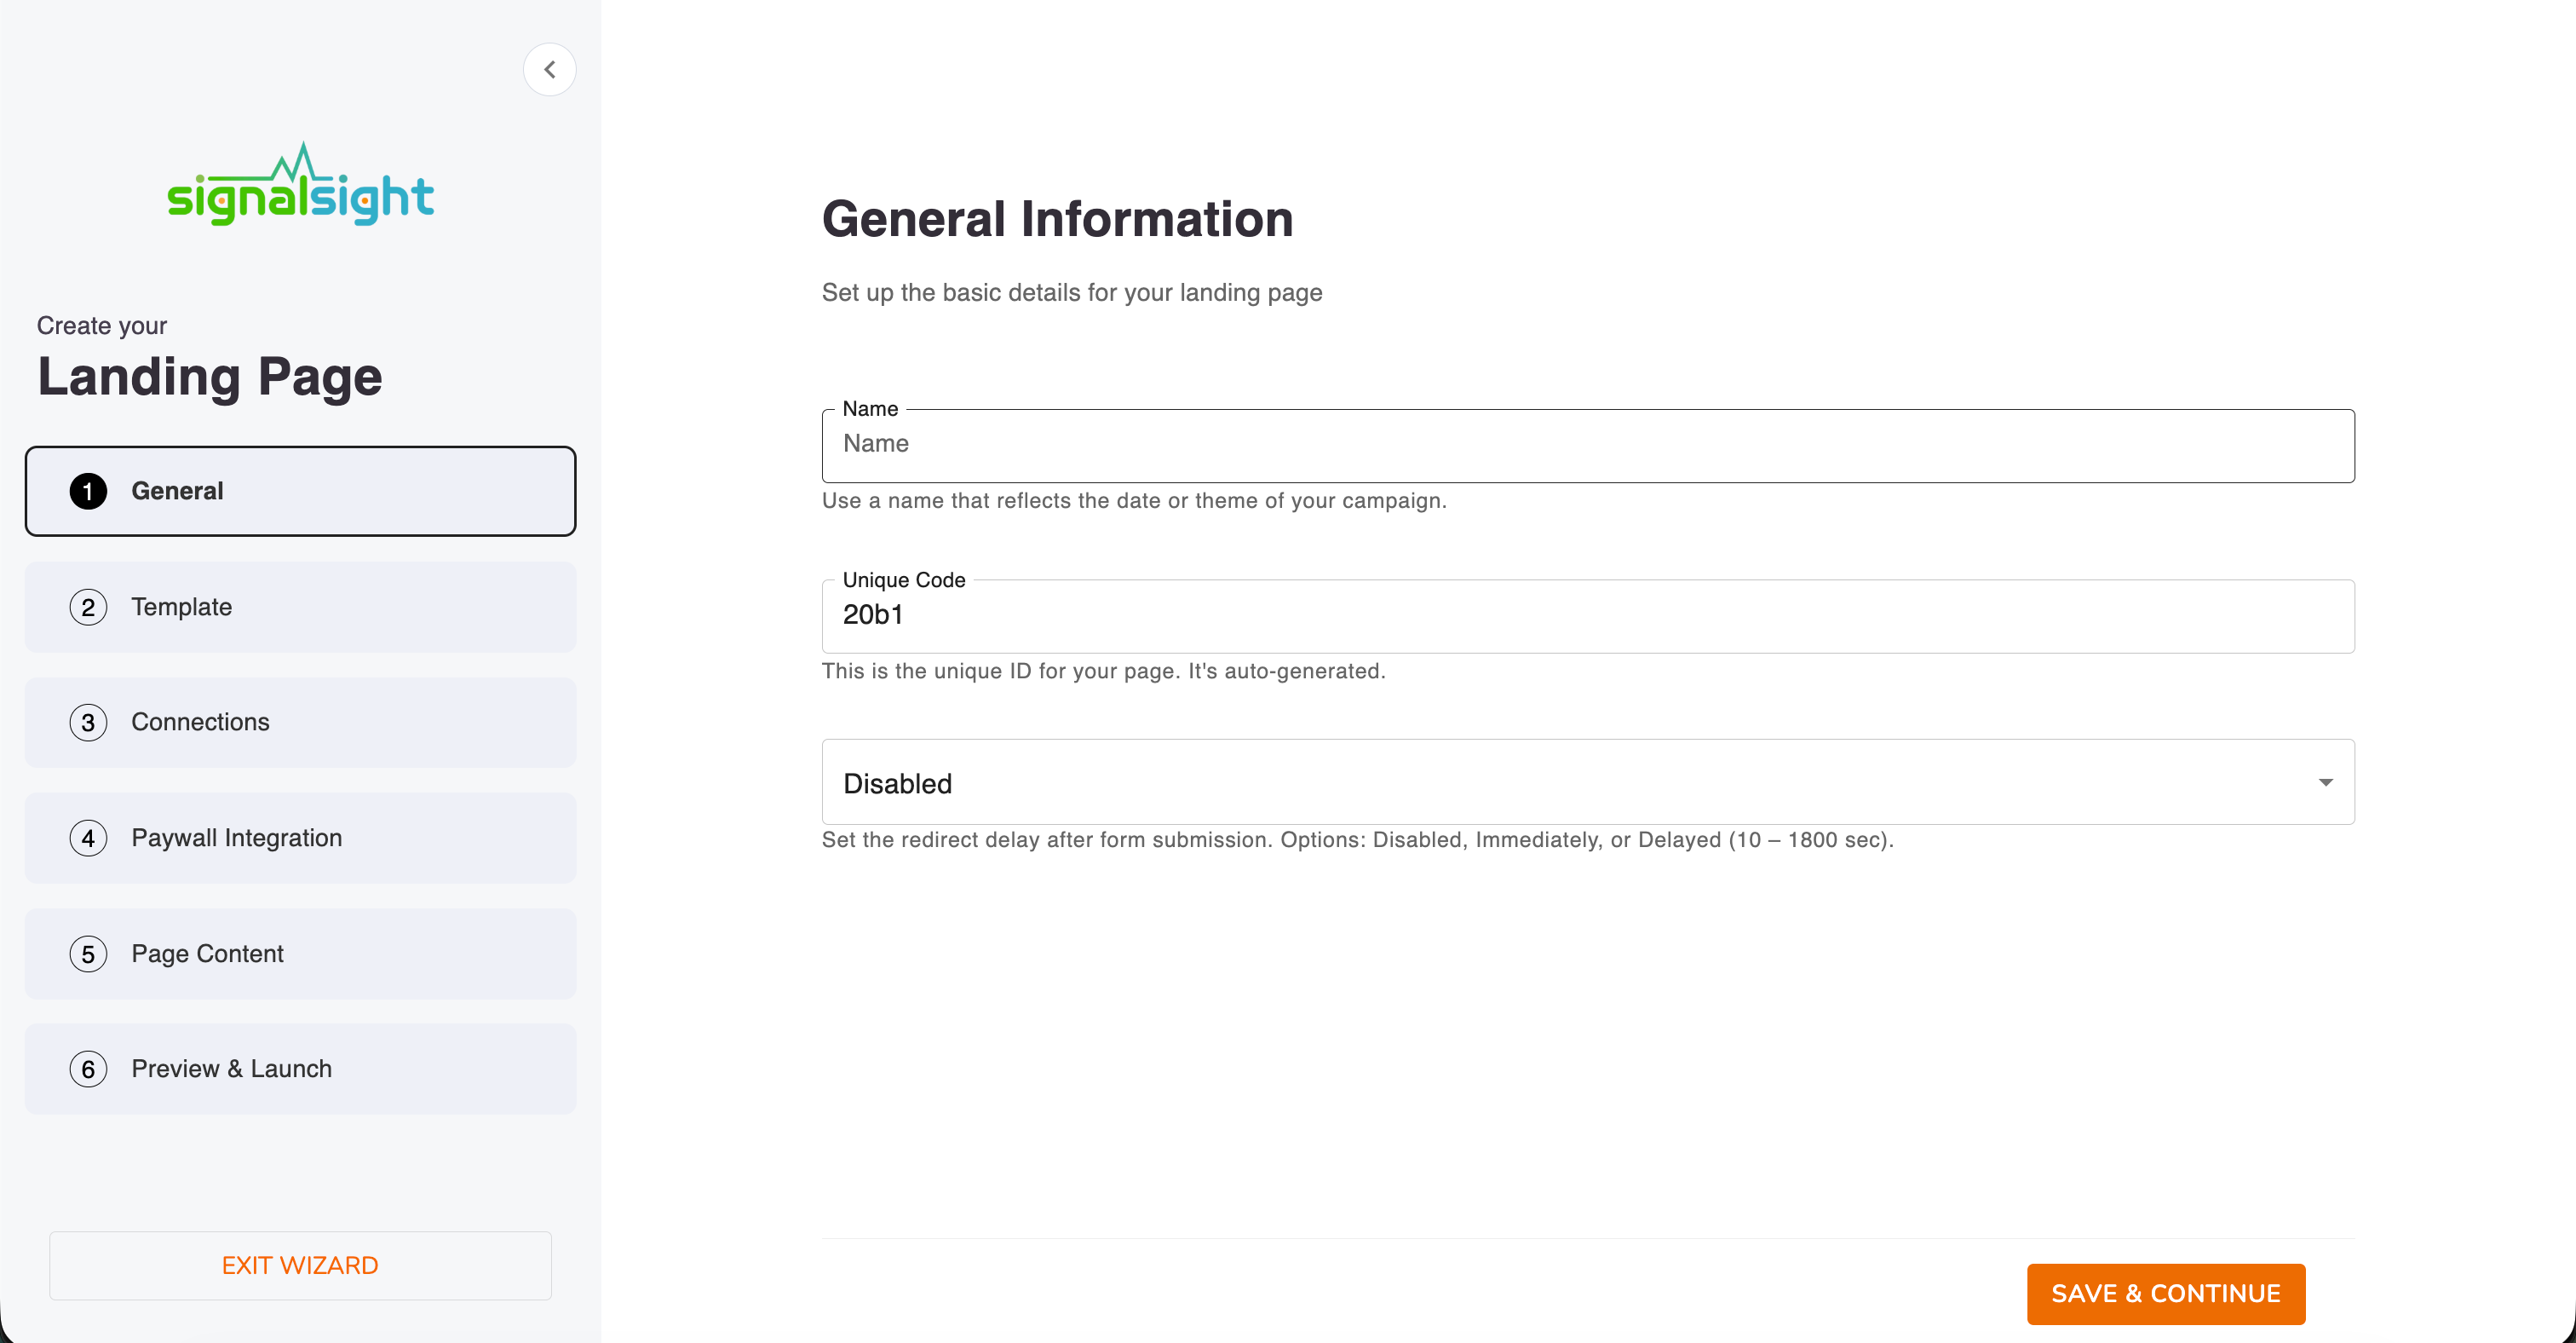
The wizard opens on the General step. Fill in the basic details for your page:
- Name: Enter the name you want to appear in the landing page URL.
- Unique Code: Auto-generated identifier used in your landing page URL. You don't need to change this.
- Redirect: Controls post-submission behavior. Choose Disabled, Immediately, or Delayed (10–1800 seconds) depending on whether users should be redirected after interacting with the page.
Click Save & Continue to move to template selection.
Step 3: Select a Layout
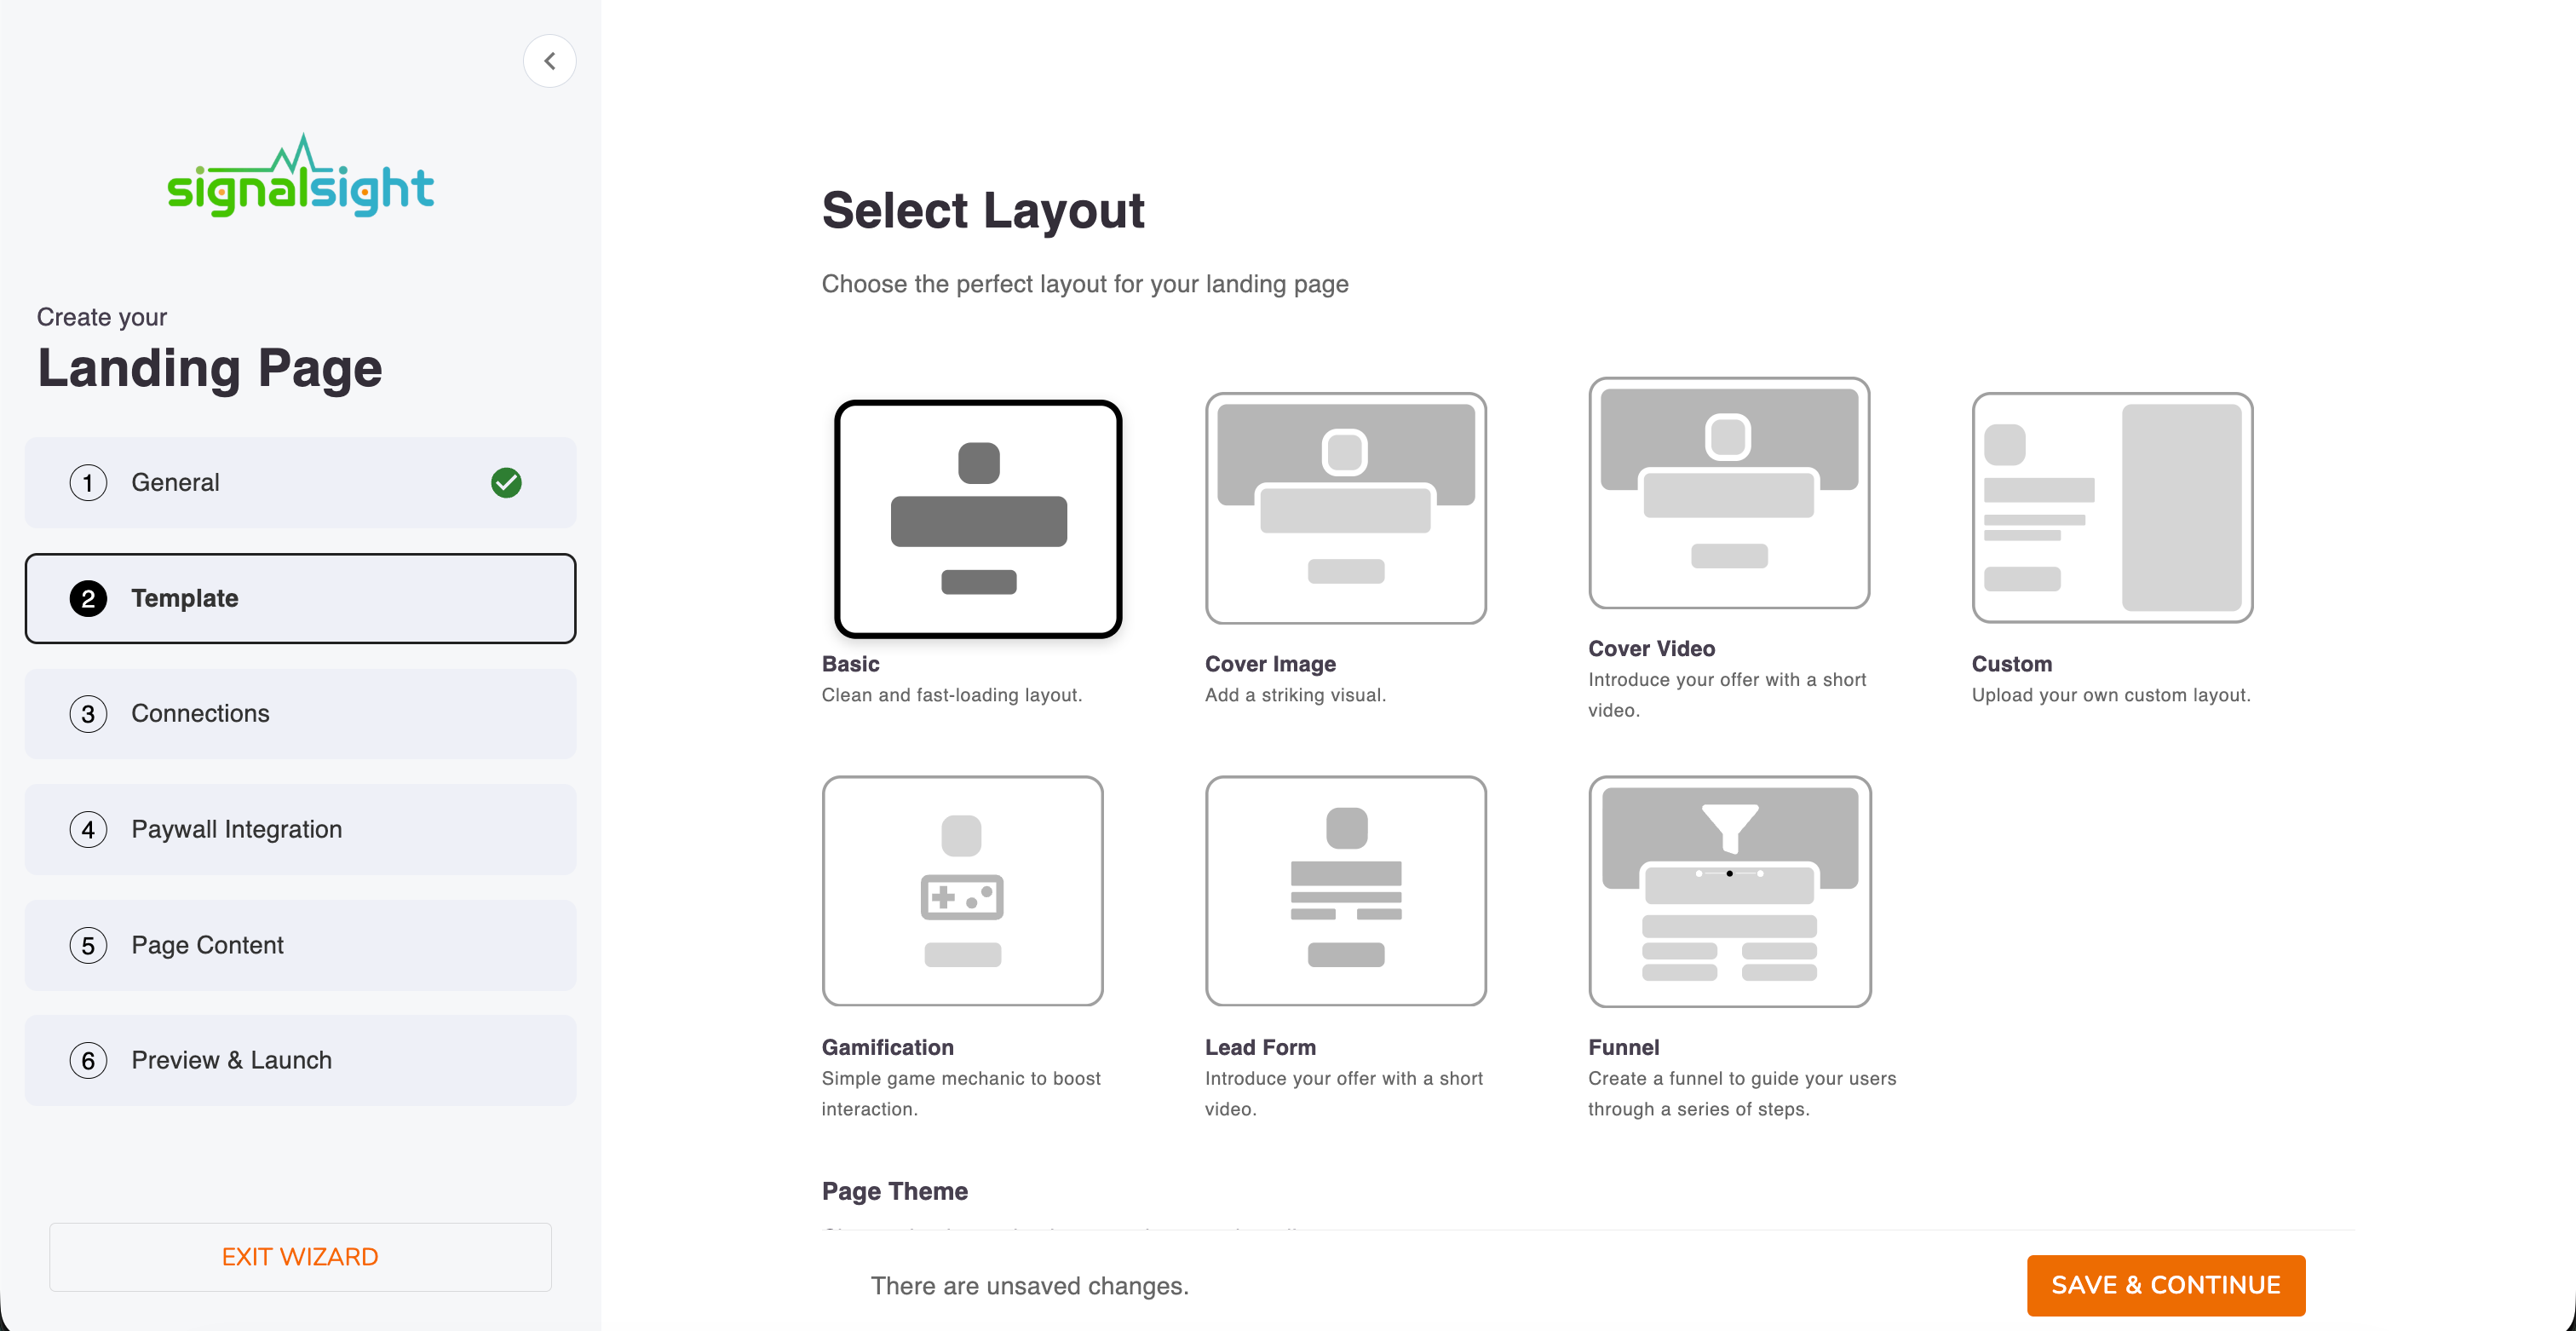
Choose the layout that best fits your campaign. Each option is optimized for a different use case:
- Basic: Clean, fast-loading layout — ideal for most Web2App campaigns.
- Cover Image: Hero image at the top to showcase your app visually.
- Cover Video: Introduce your offer with a short autoplay video.
- Custom: Upload your own HTML layout for full design control.
- Gamification: Simple game mechanic to boost user interaction.
- Lead Form: Capture leads with an embedded form before redirect.
- Funnel: Multi-step funnel to guide users through a sequence of screens.
Below the layout grid, pick a Page Theme to set the color scheme. Click Save & Continue when you're done.
Step 4: Connections & Integrations
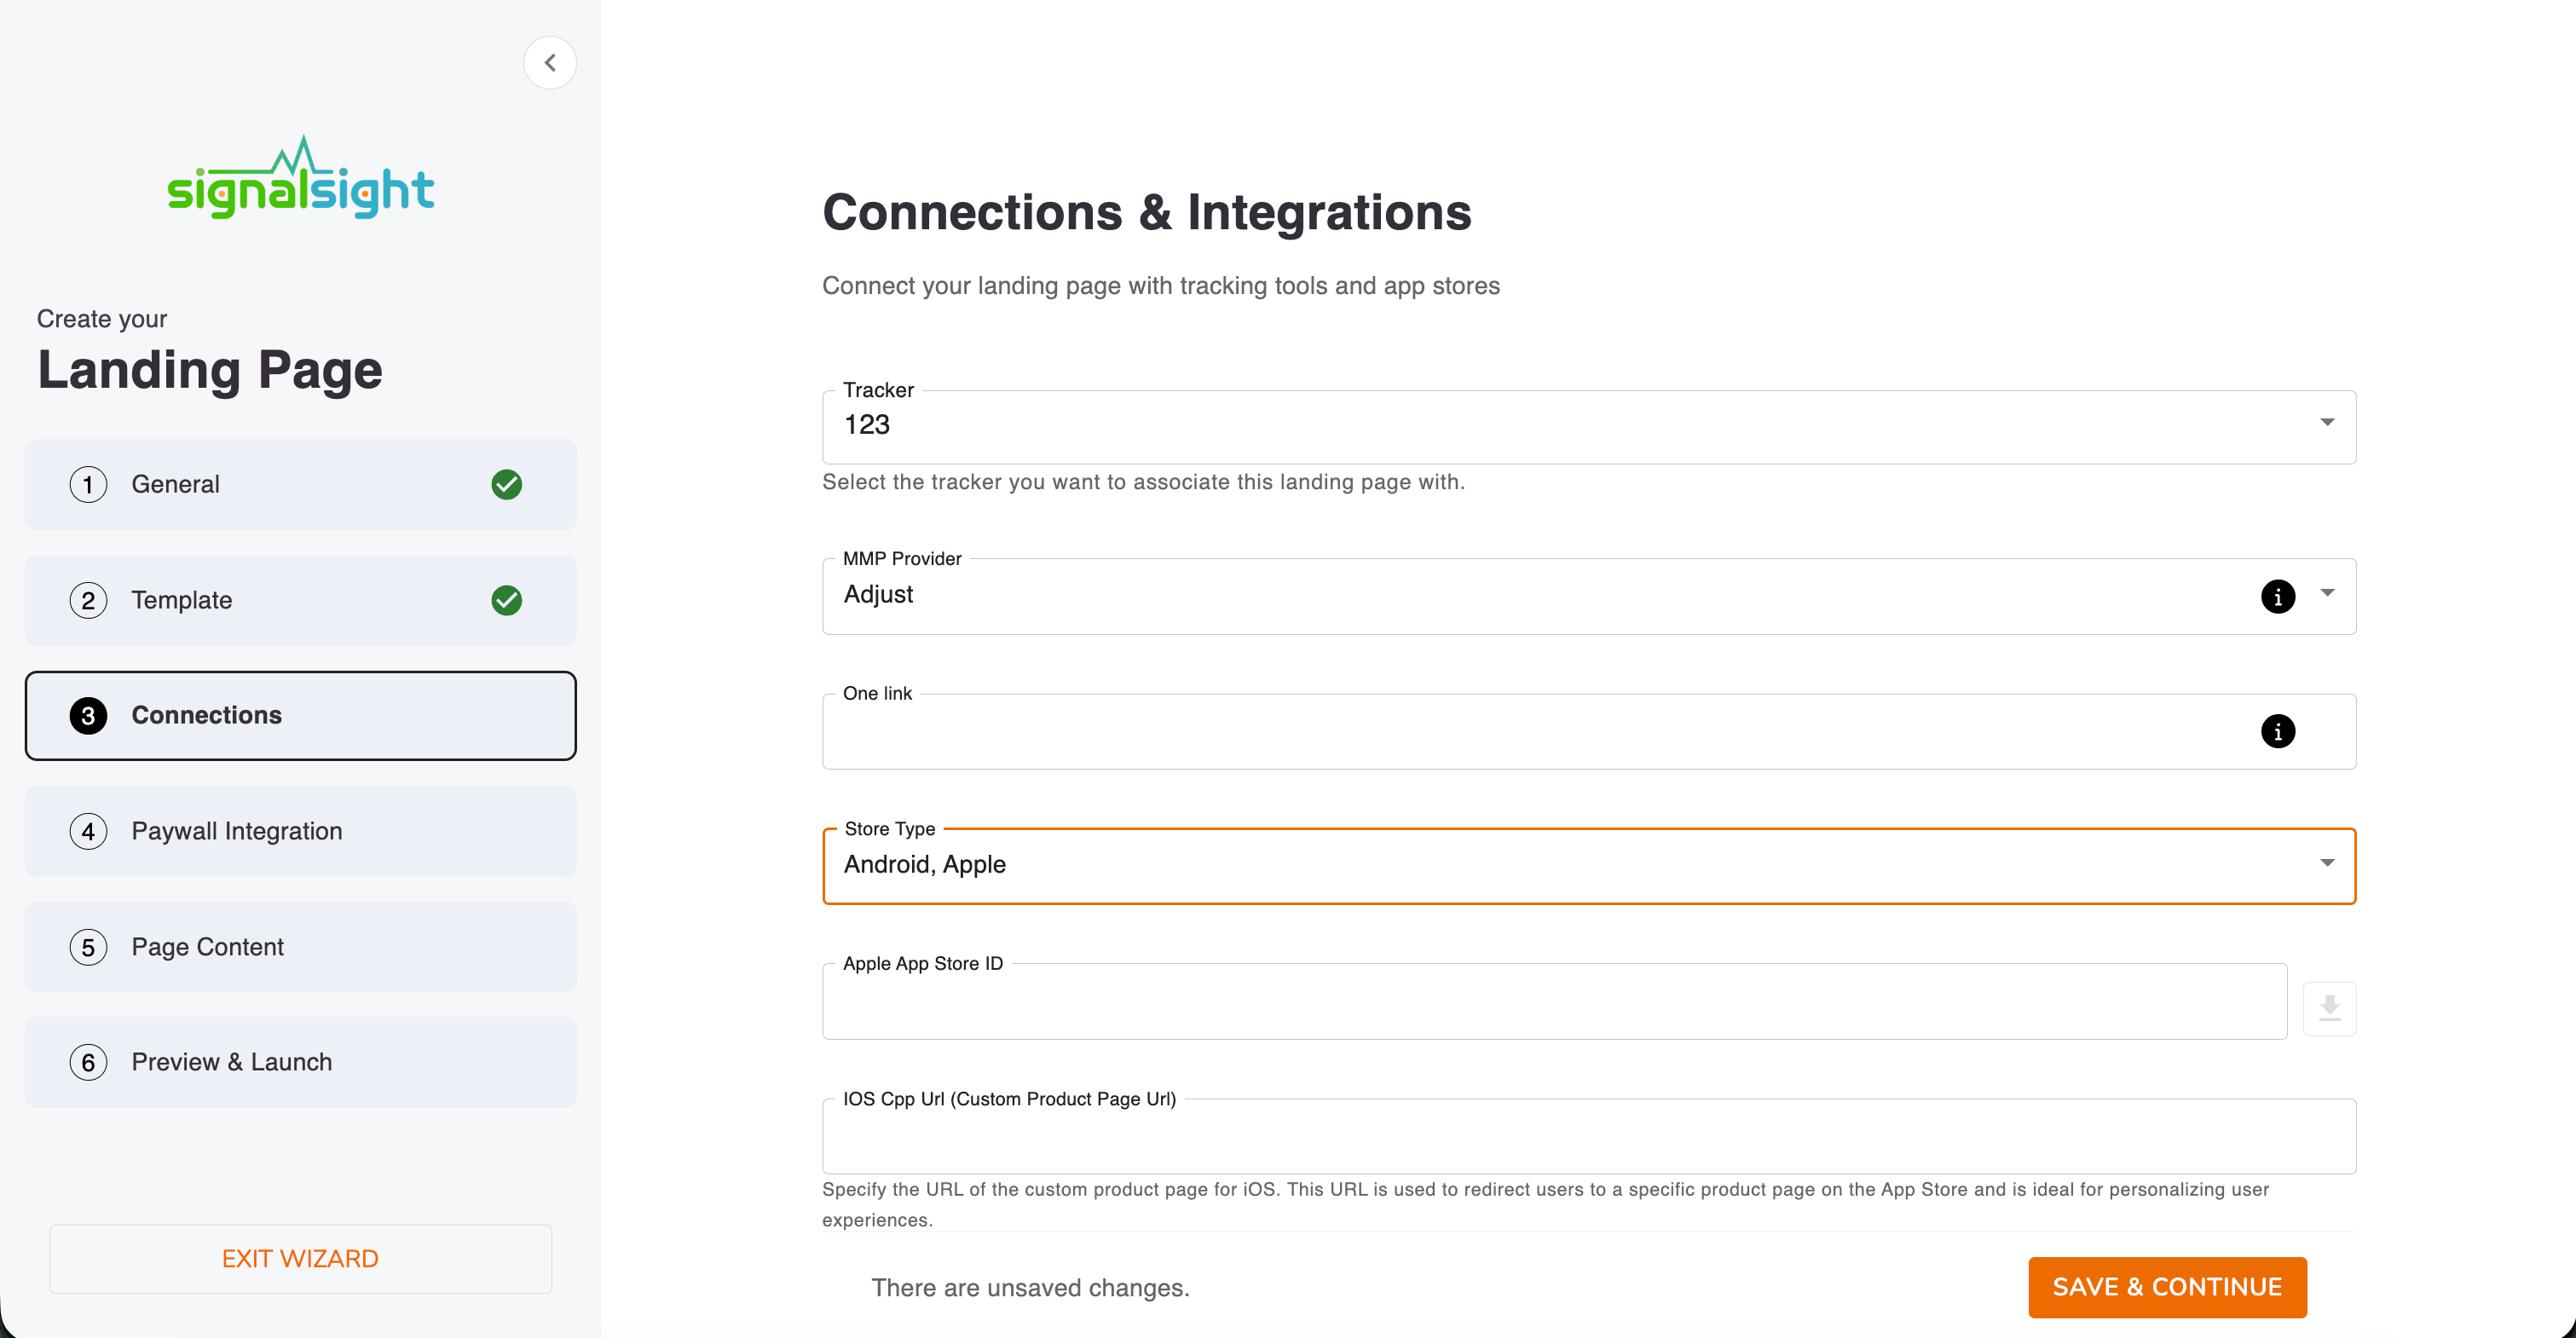
This is where you link the landing page to your tracking and app store setup. The key fields:
- Tracker: Select the tracker you want to associate with this landing page. Events from this page will route through the tracker to your connected ad platforms.
- MMP Provider: Choose Adjust or AppsFlyer if you're running a Web2App campaign.
- One Link: Select your MMP OneLink template for market-aware store redirection.
- Store Type: Pick which app stores to support — Android, Apple, or both.
- Apple App Store ID: Your iOS app's App Store identifier. Click the icon next to the field to pull app details from the App Store — title, description, and logo are auto-filled in the Page Content step.
- Android Store ID: Your Android app's Google Play Store identifier.
- iOS CPP URL: Optional Custom Product Page URL — redirects users to a specific App Store product page for personalized campaigns.
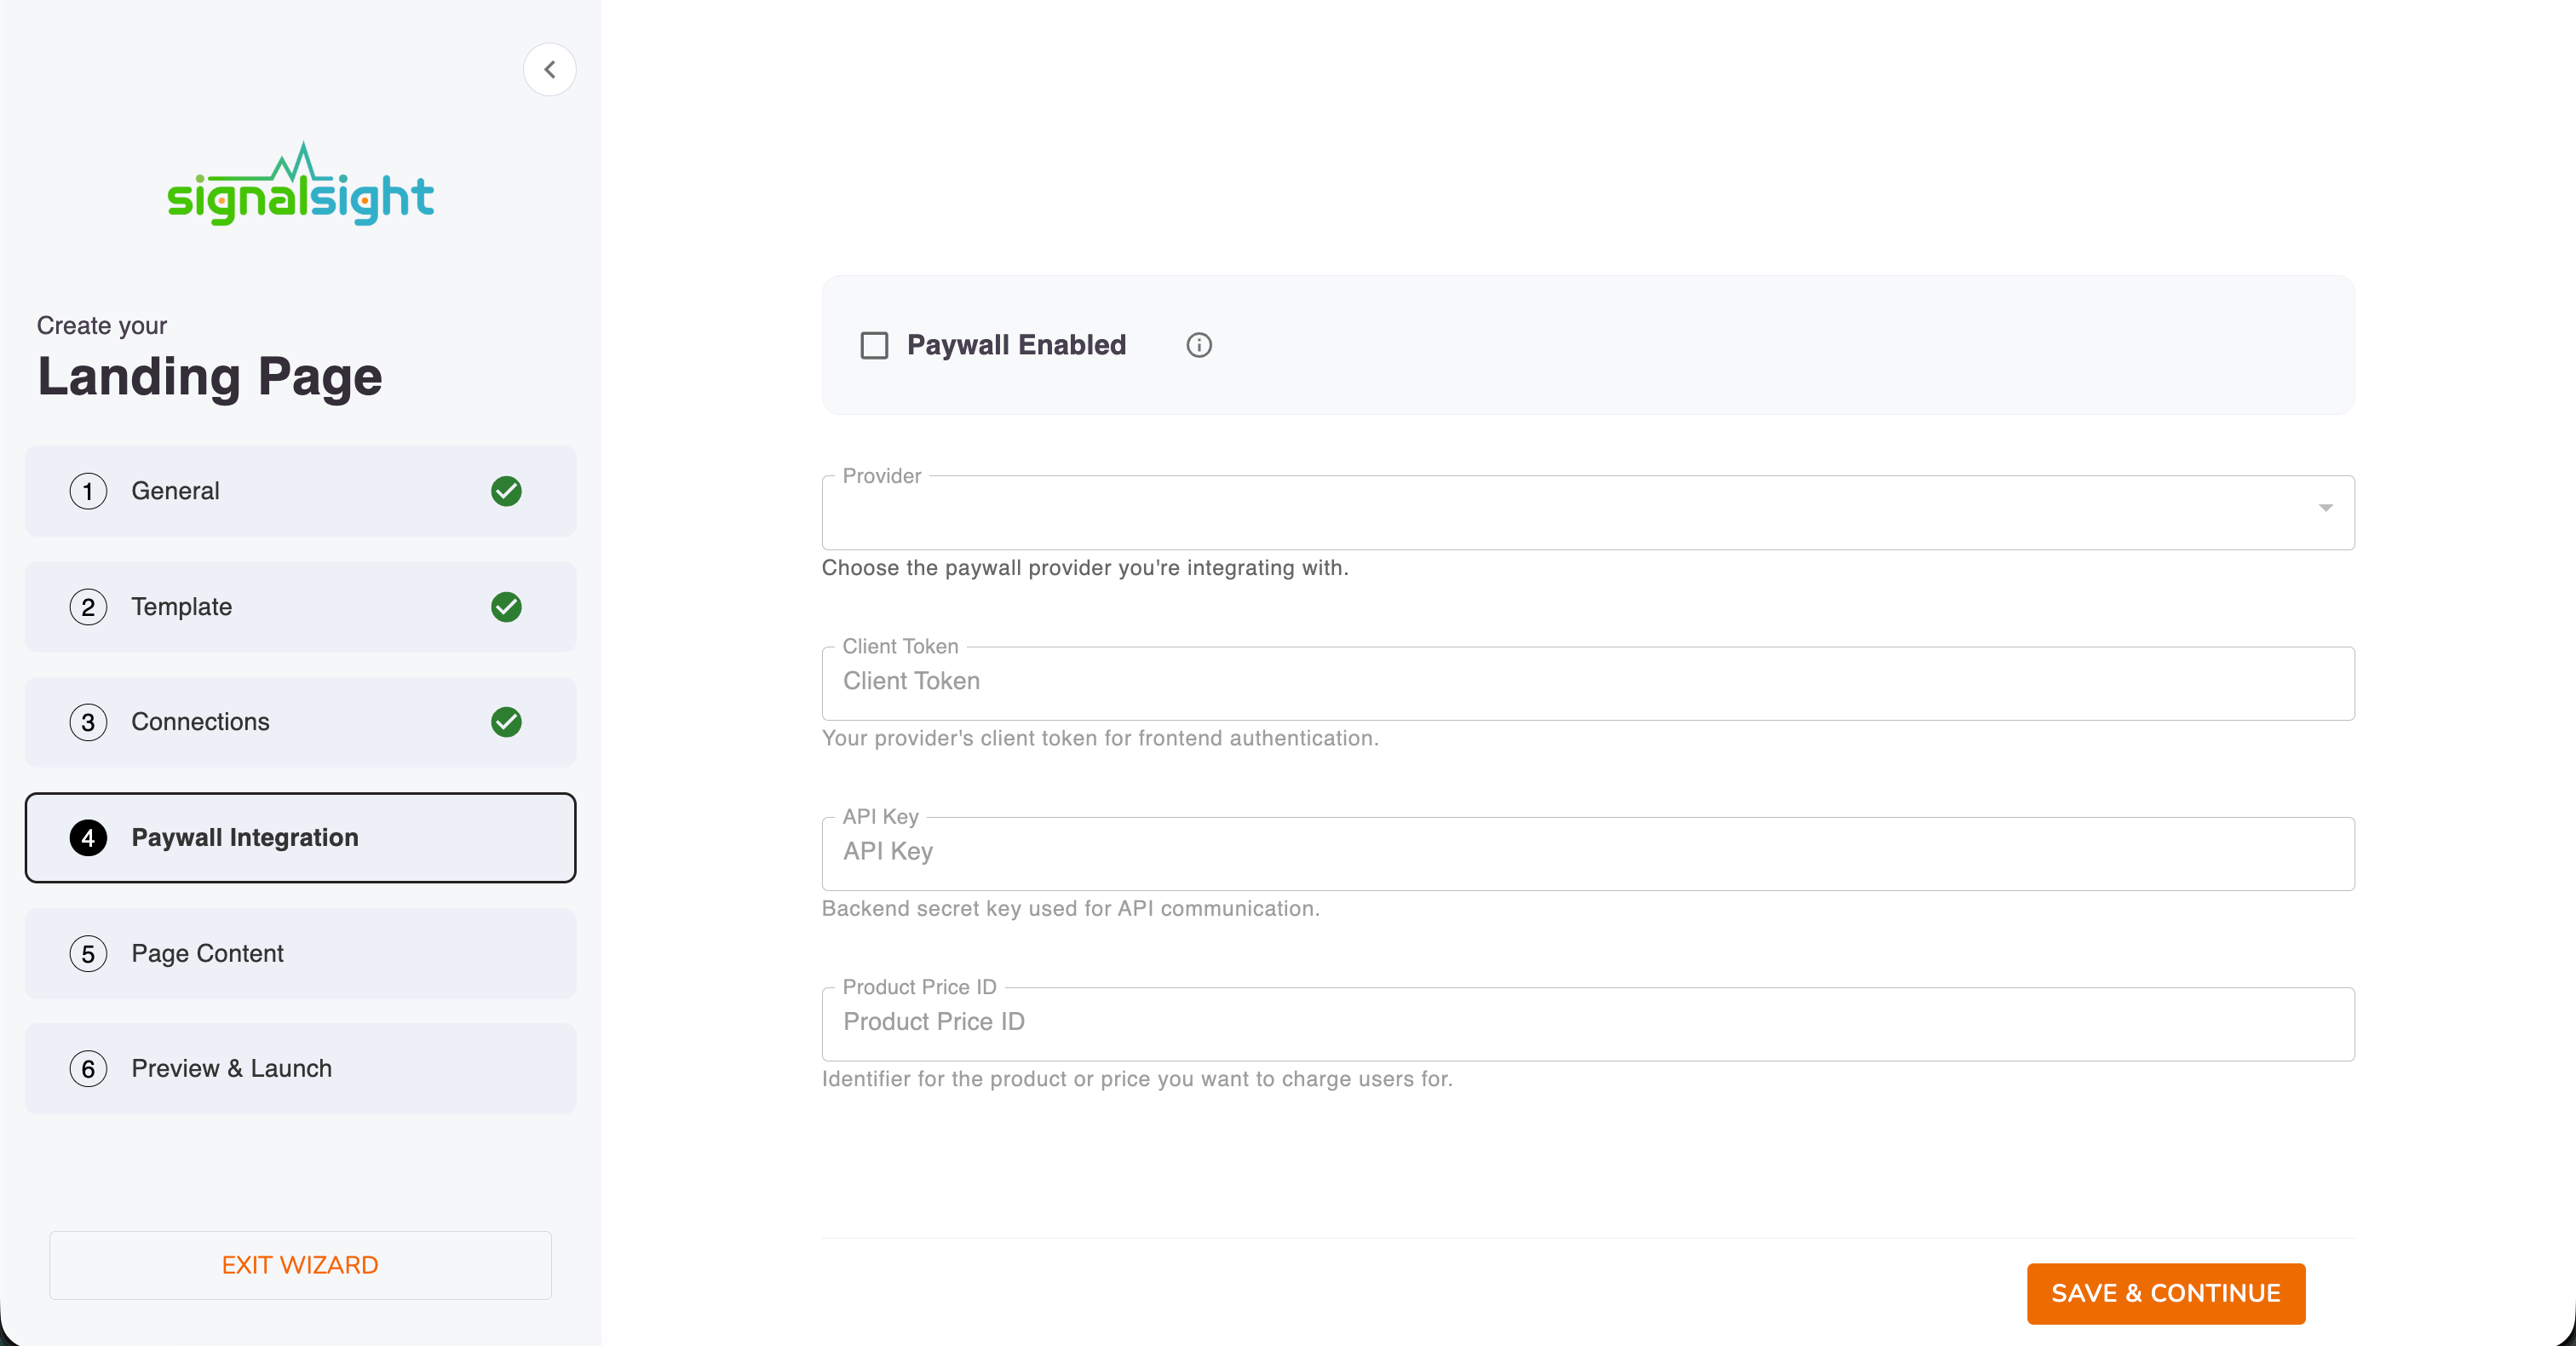
Step 5: Paywall Integration (Optional)
If your landing page includes a paid offer, enable Paywall Enabled and fill in your provider credentials. Skip this step if your page only drives free app installs.
- Provider: The paywall service you're integrating with.
- Client Token: Frontend authentication token from your provider.
- API Key: Backend secret key for server-side API calls.
- Product Price ID: The product or price tier you want to charge users for.
Step 6: Page Content
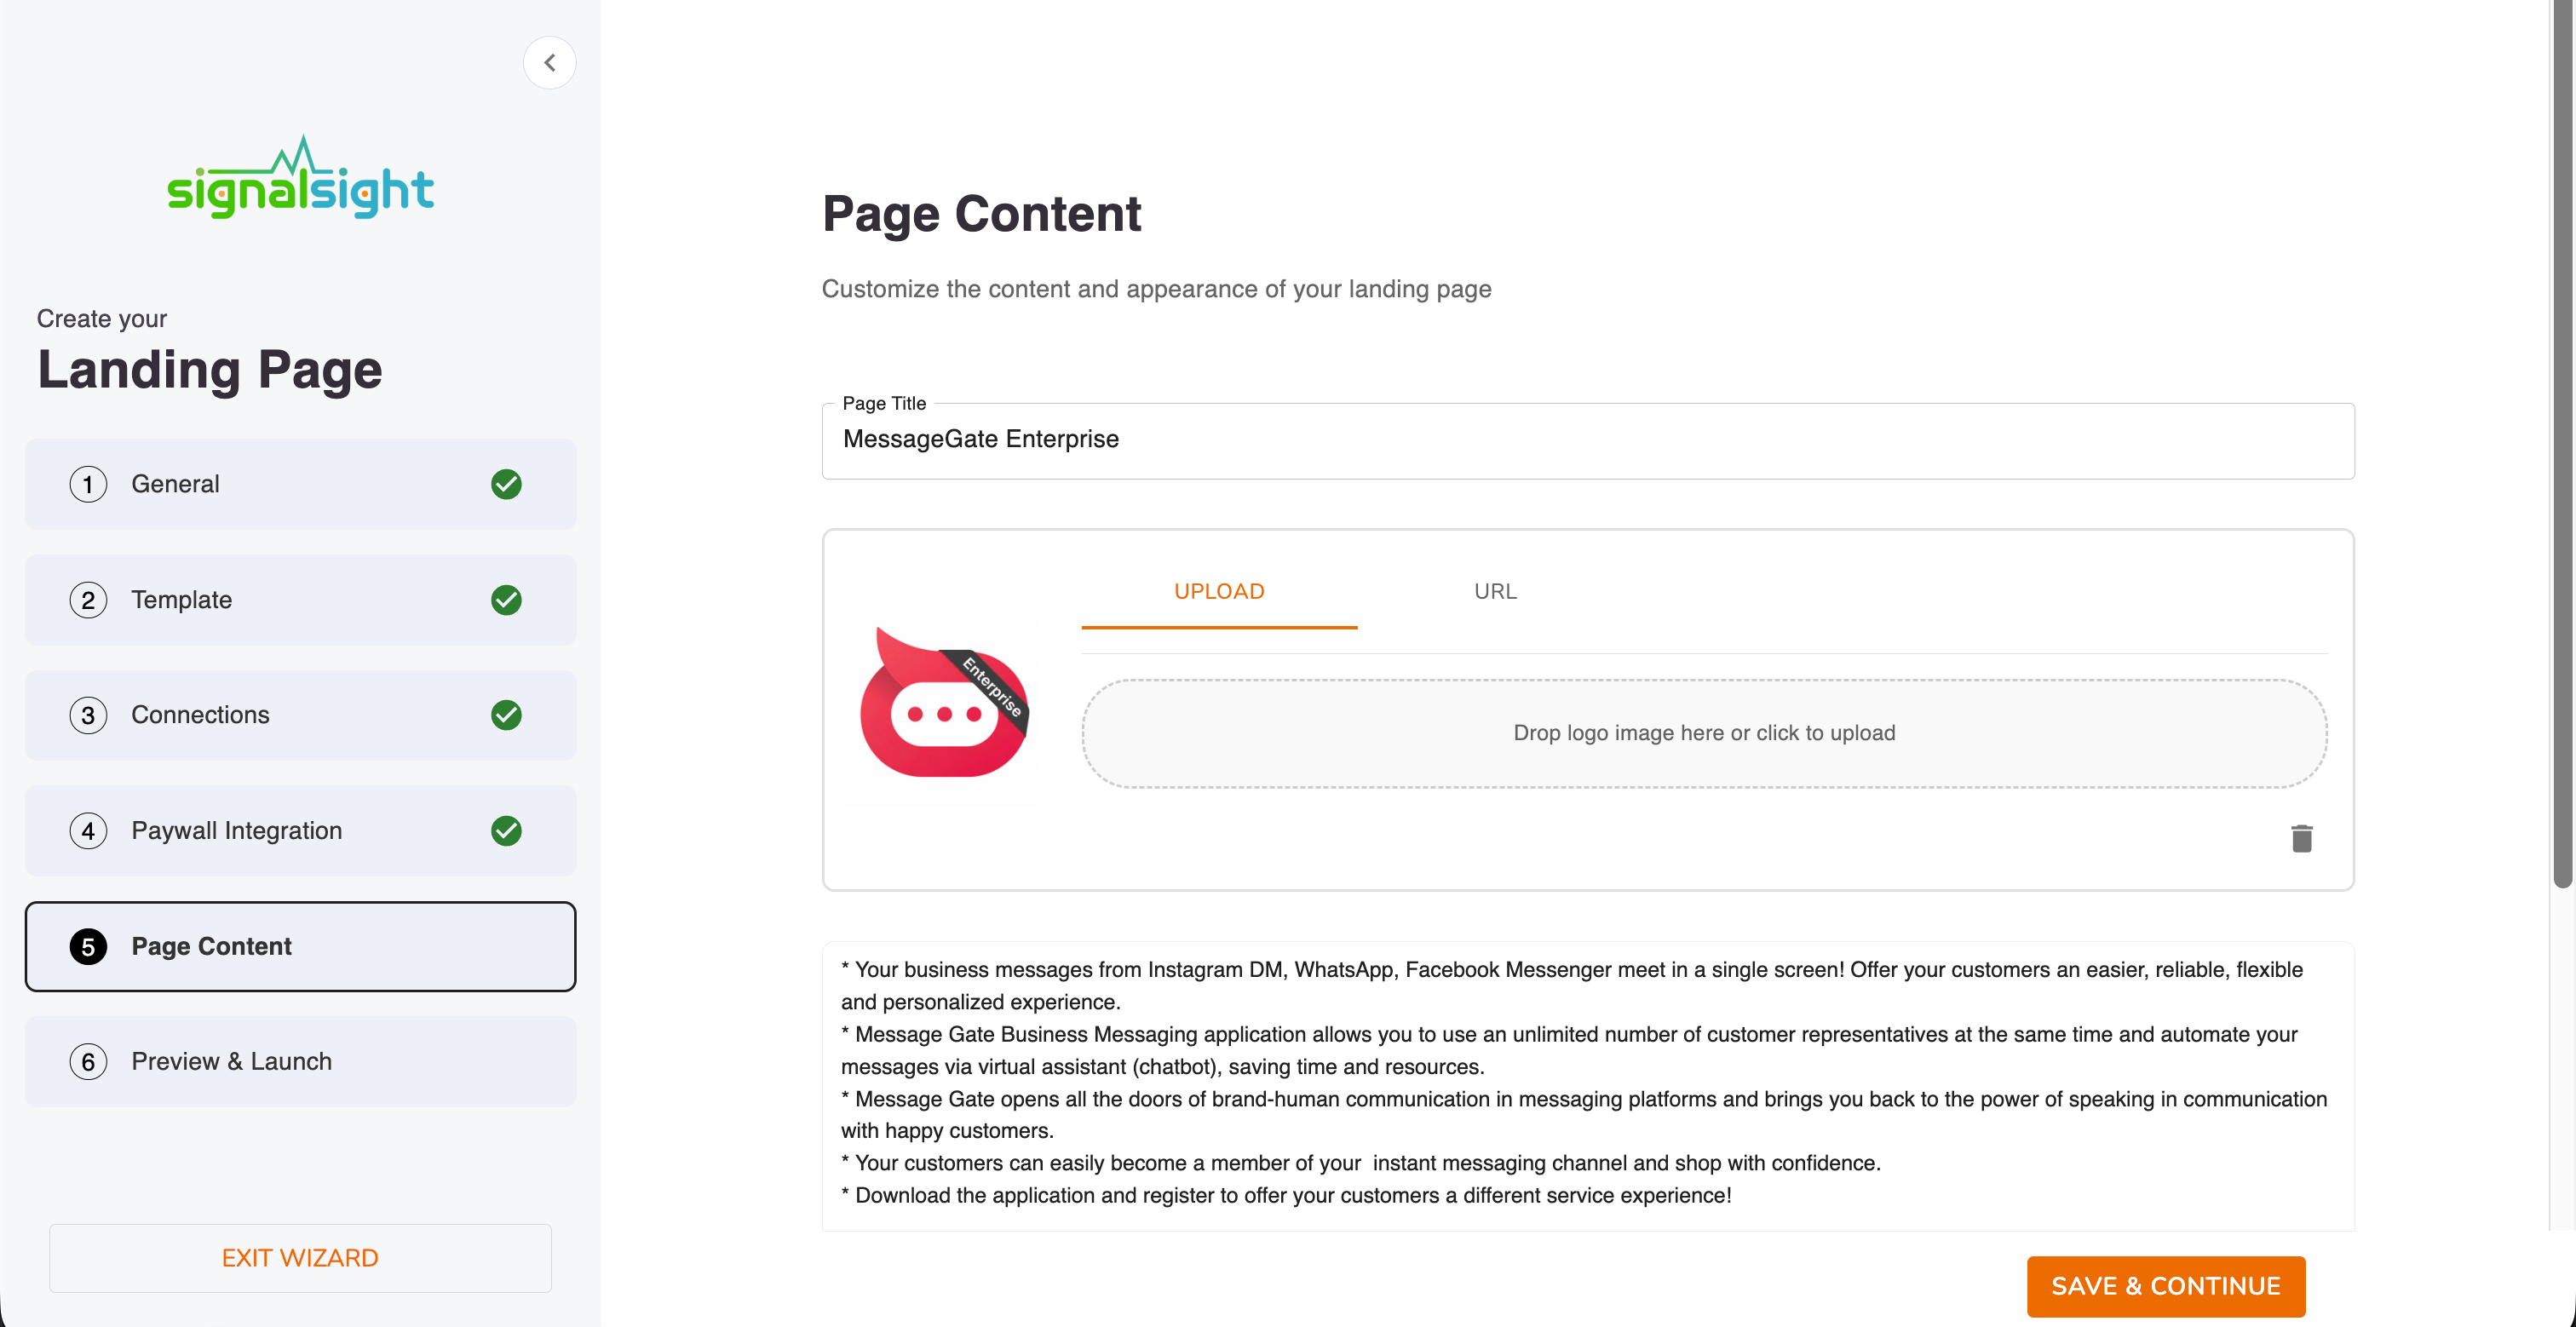
Customize what visitors see on your landing page:
- Page Title: The headline displayed at the top of the page.
- Logo: Upload an image or paste a URL — this appears above the title.
- Description: The body text that explains your app's value proposition. Keep it concise and action-oriented.
Click Save & Continue to preview your page.
Step 7: Preview & Launch
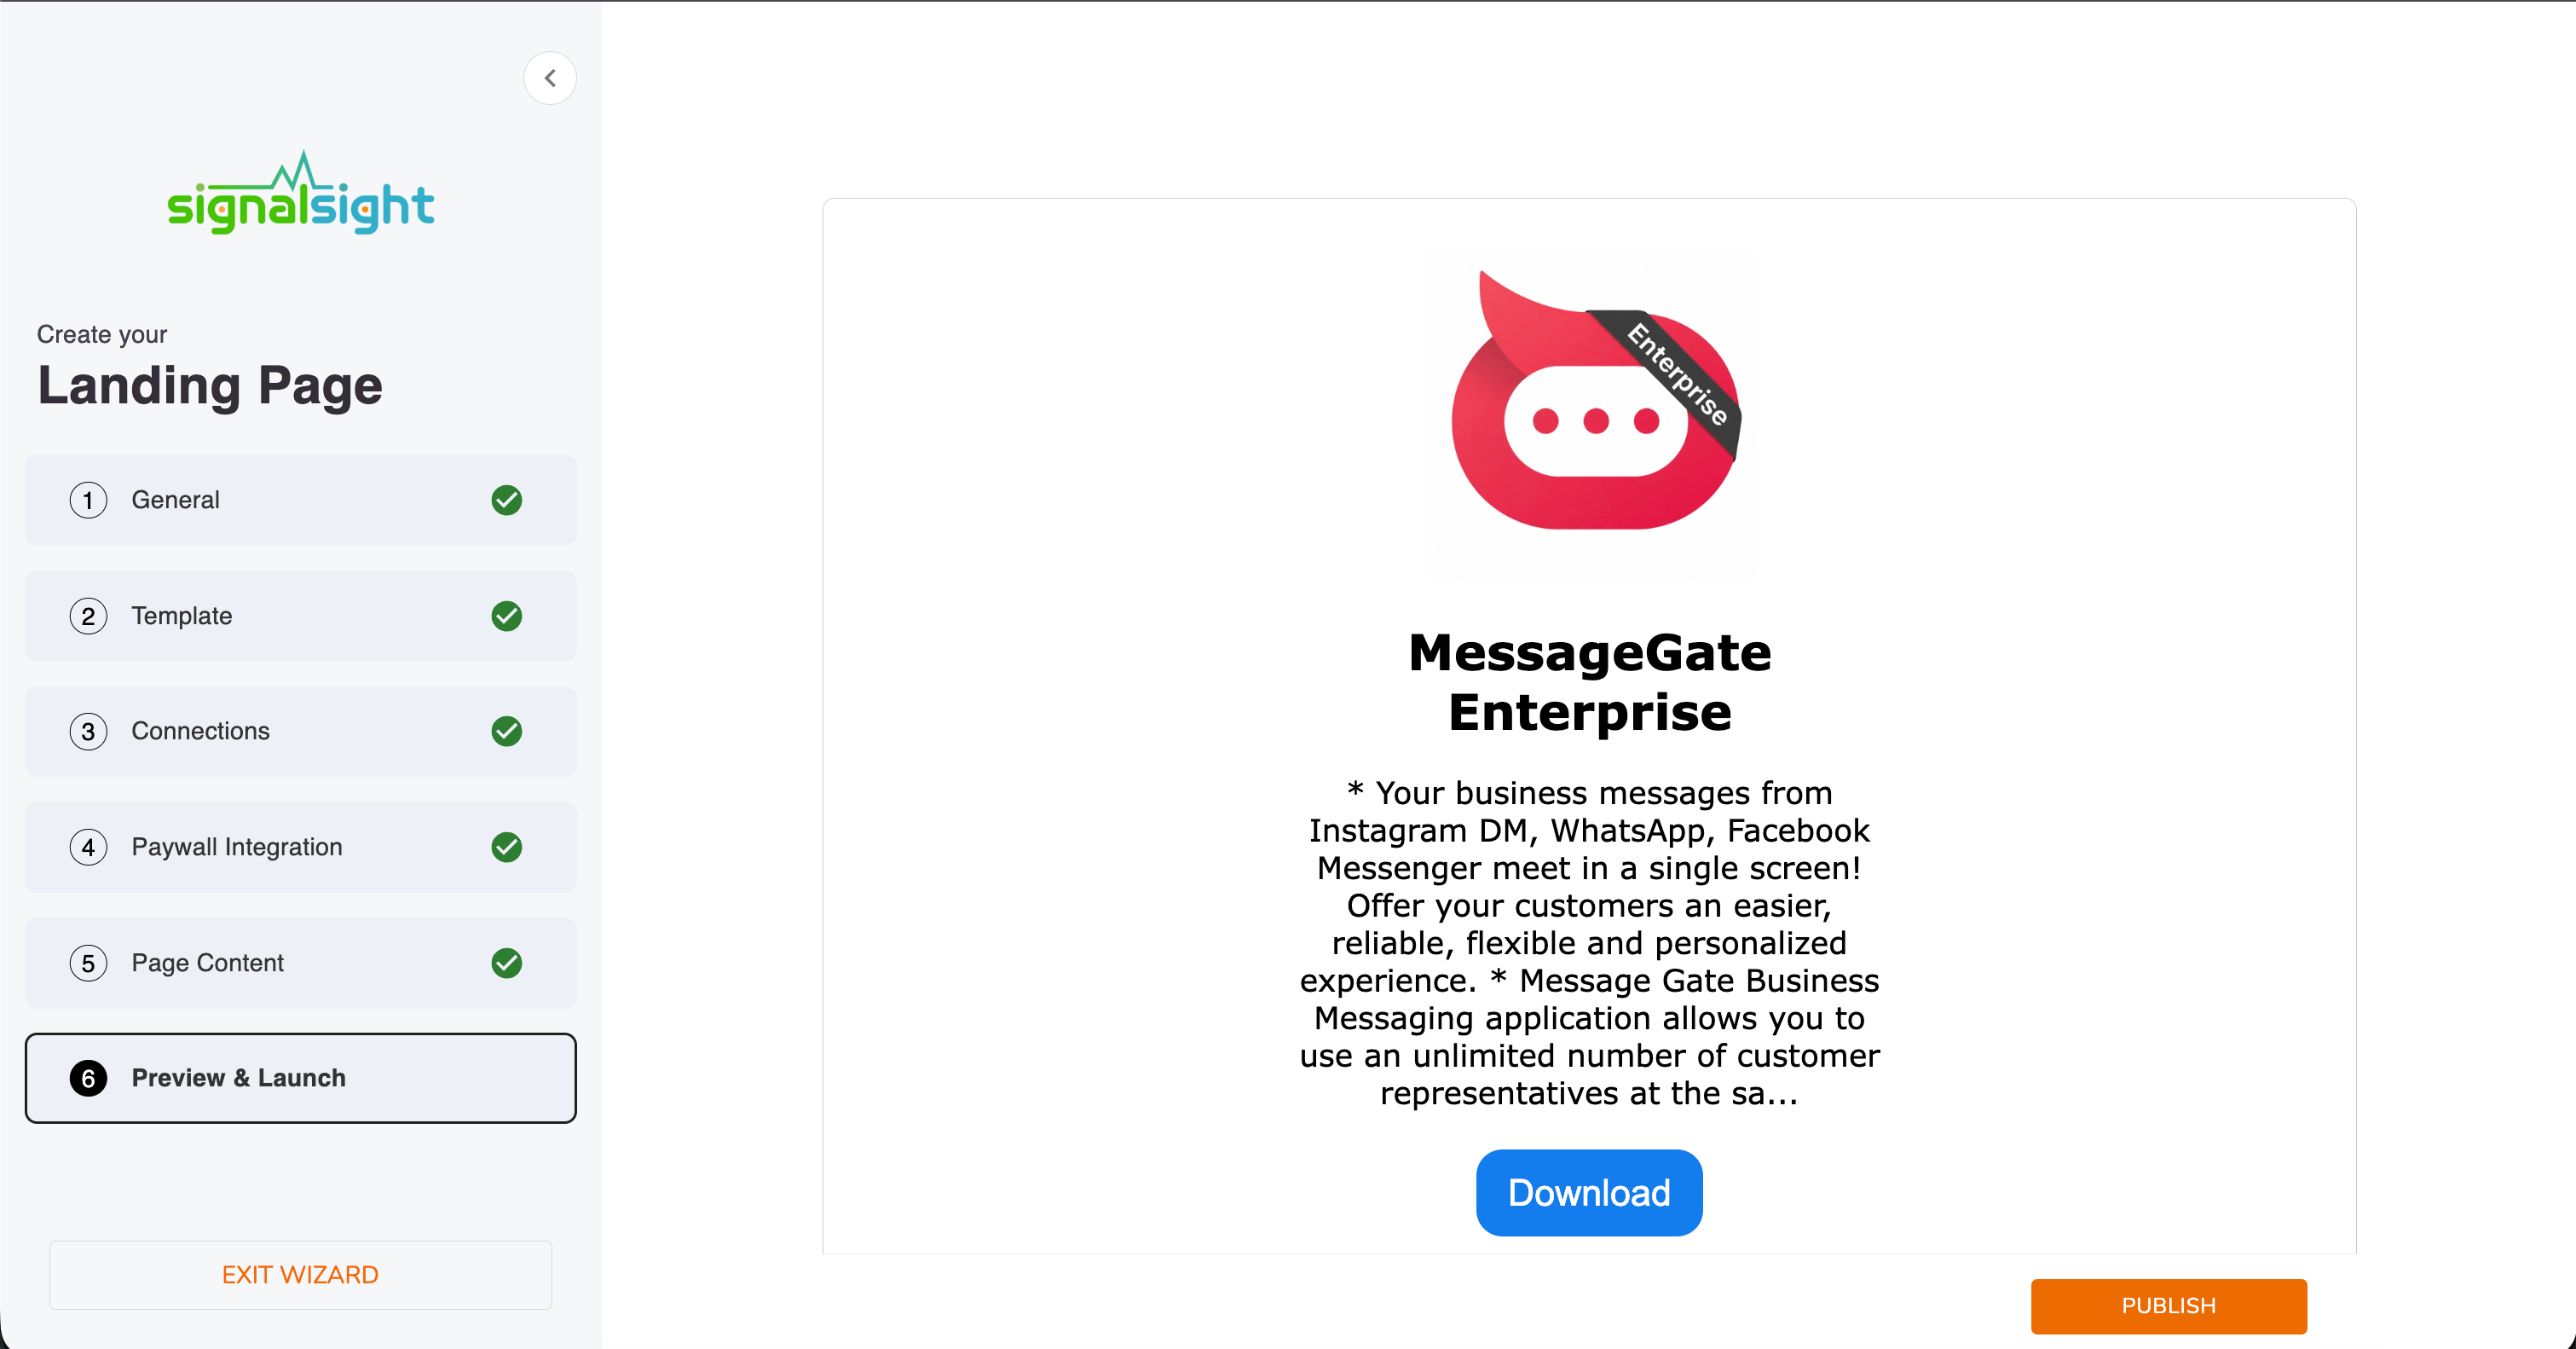
Review the live preview on the right. Check the title, logo, description, and download button look correct on mobile. When you're satisfied, click Publish to make the page live.
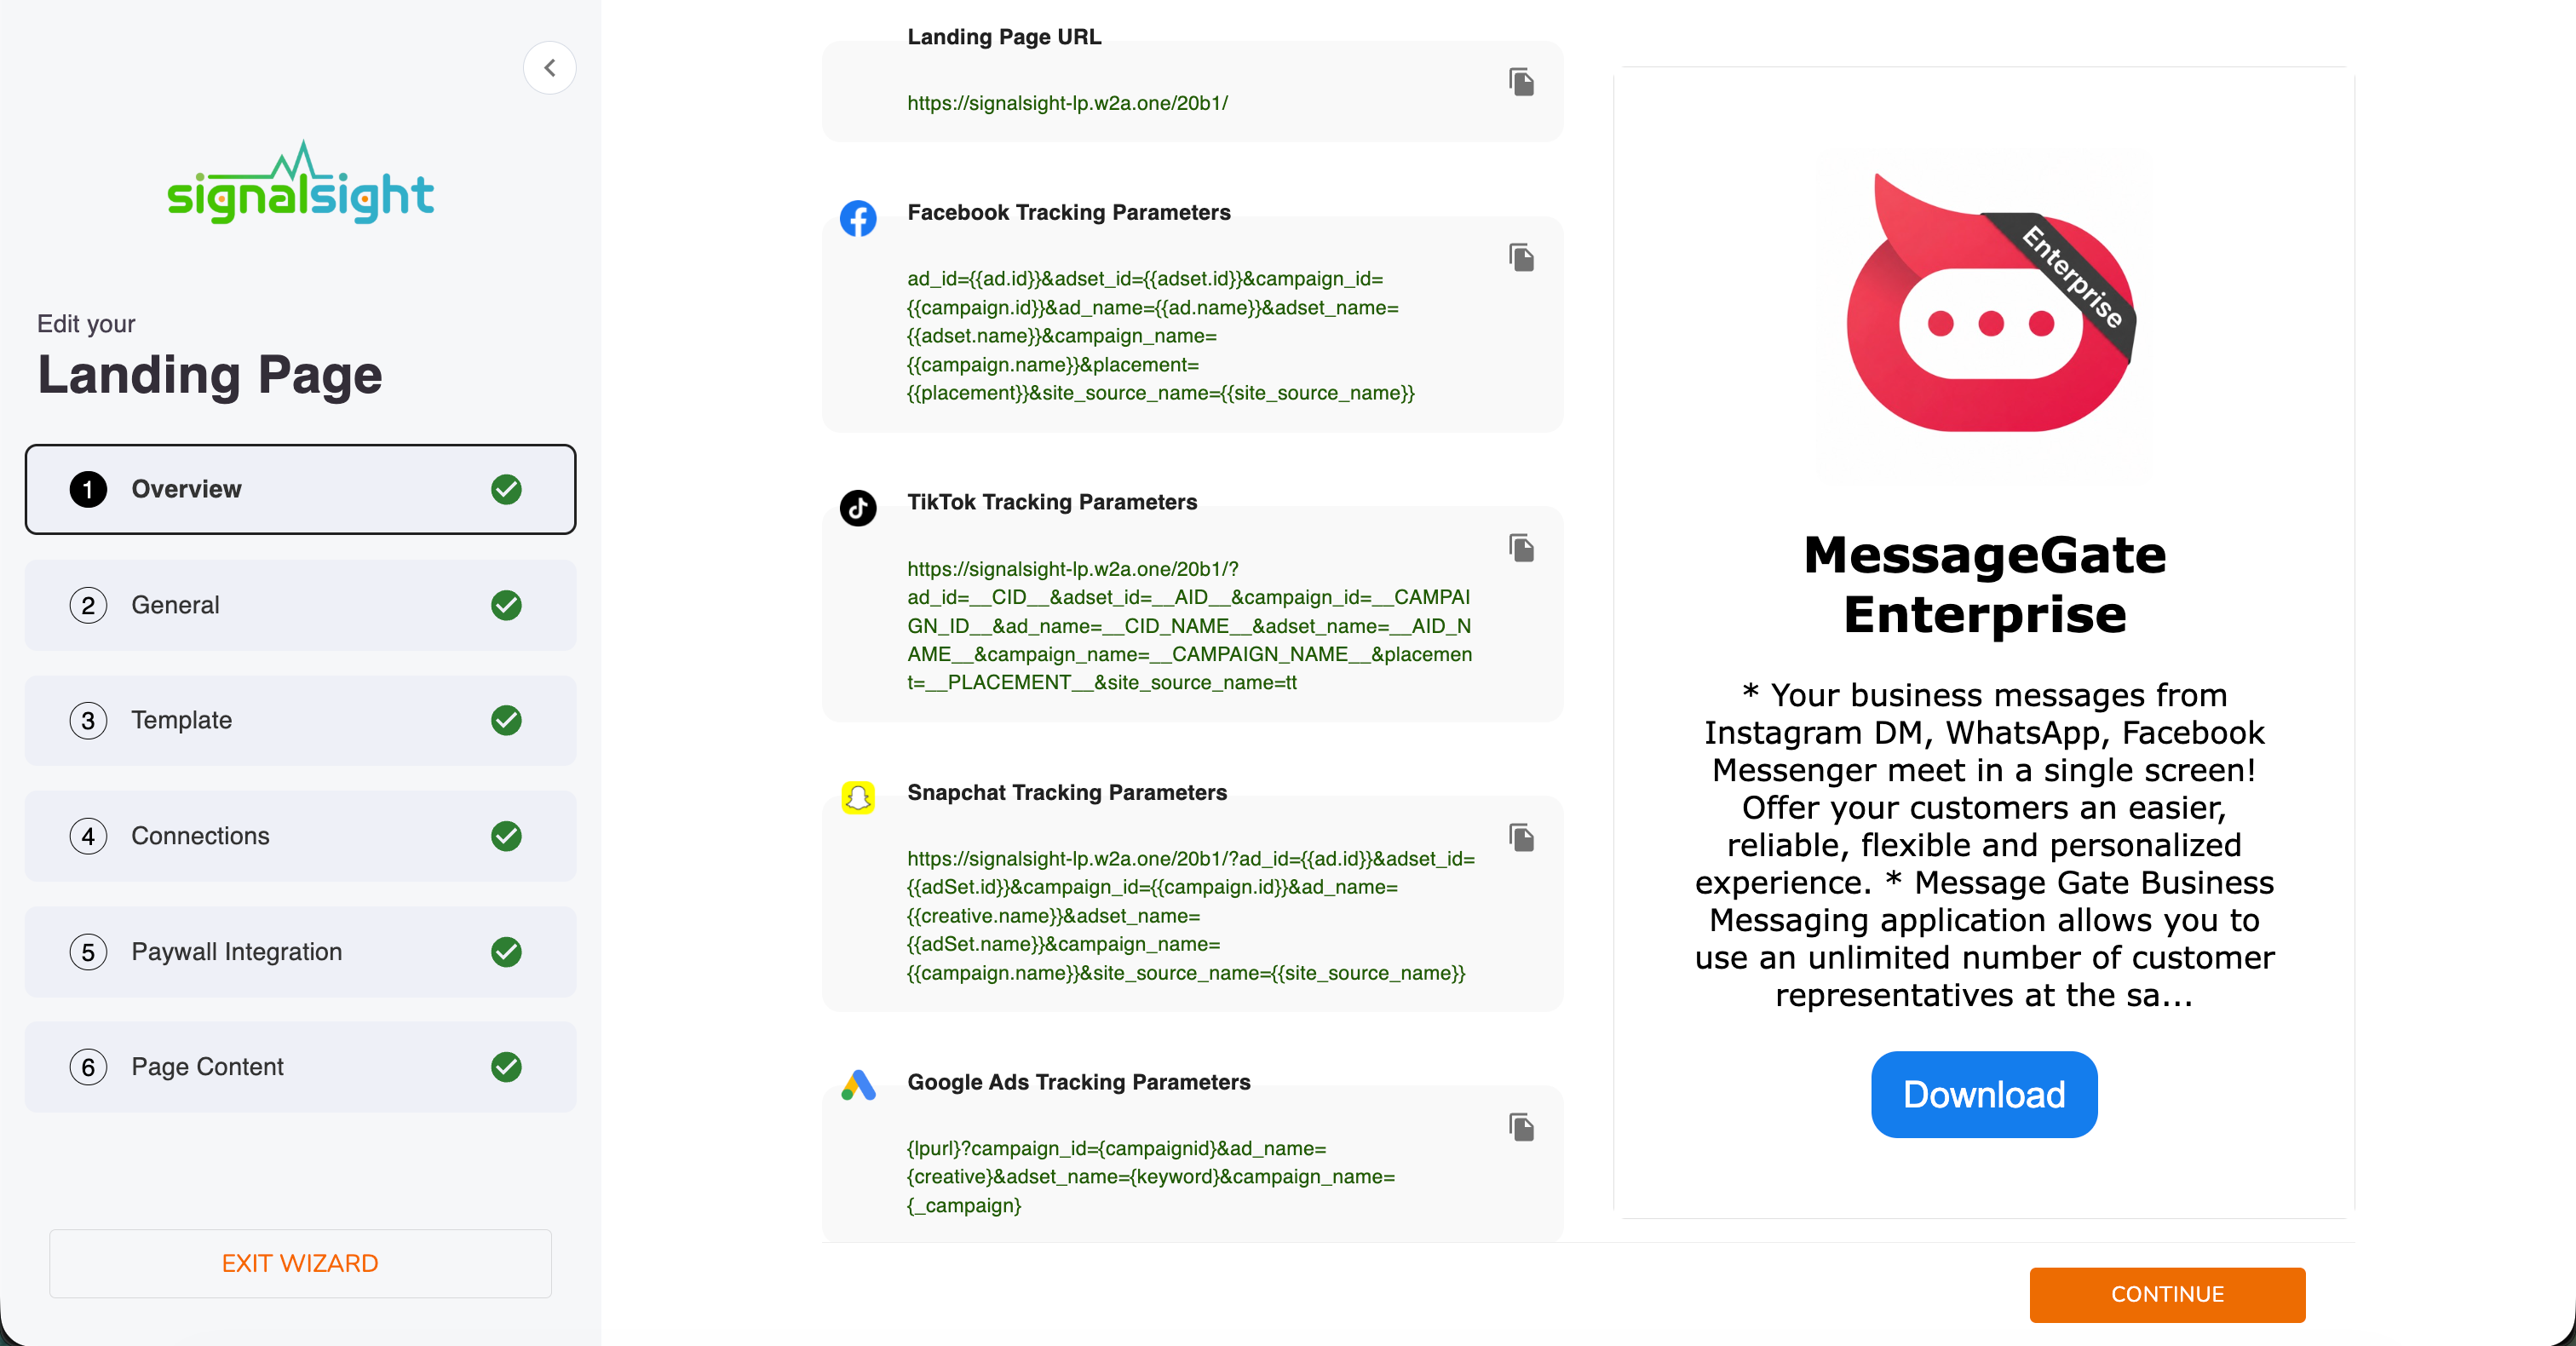
Step 8: Copy Your Tracking URLs
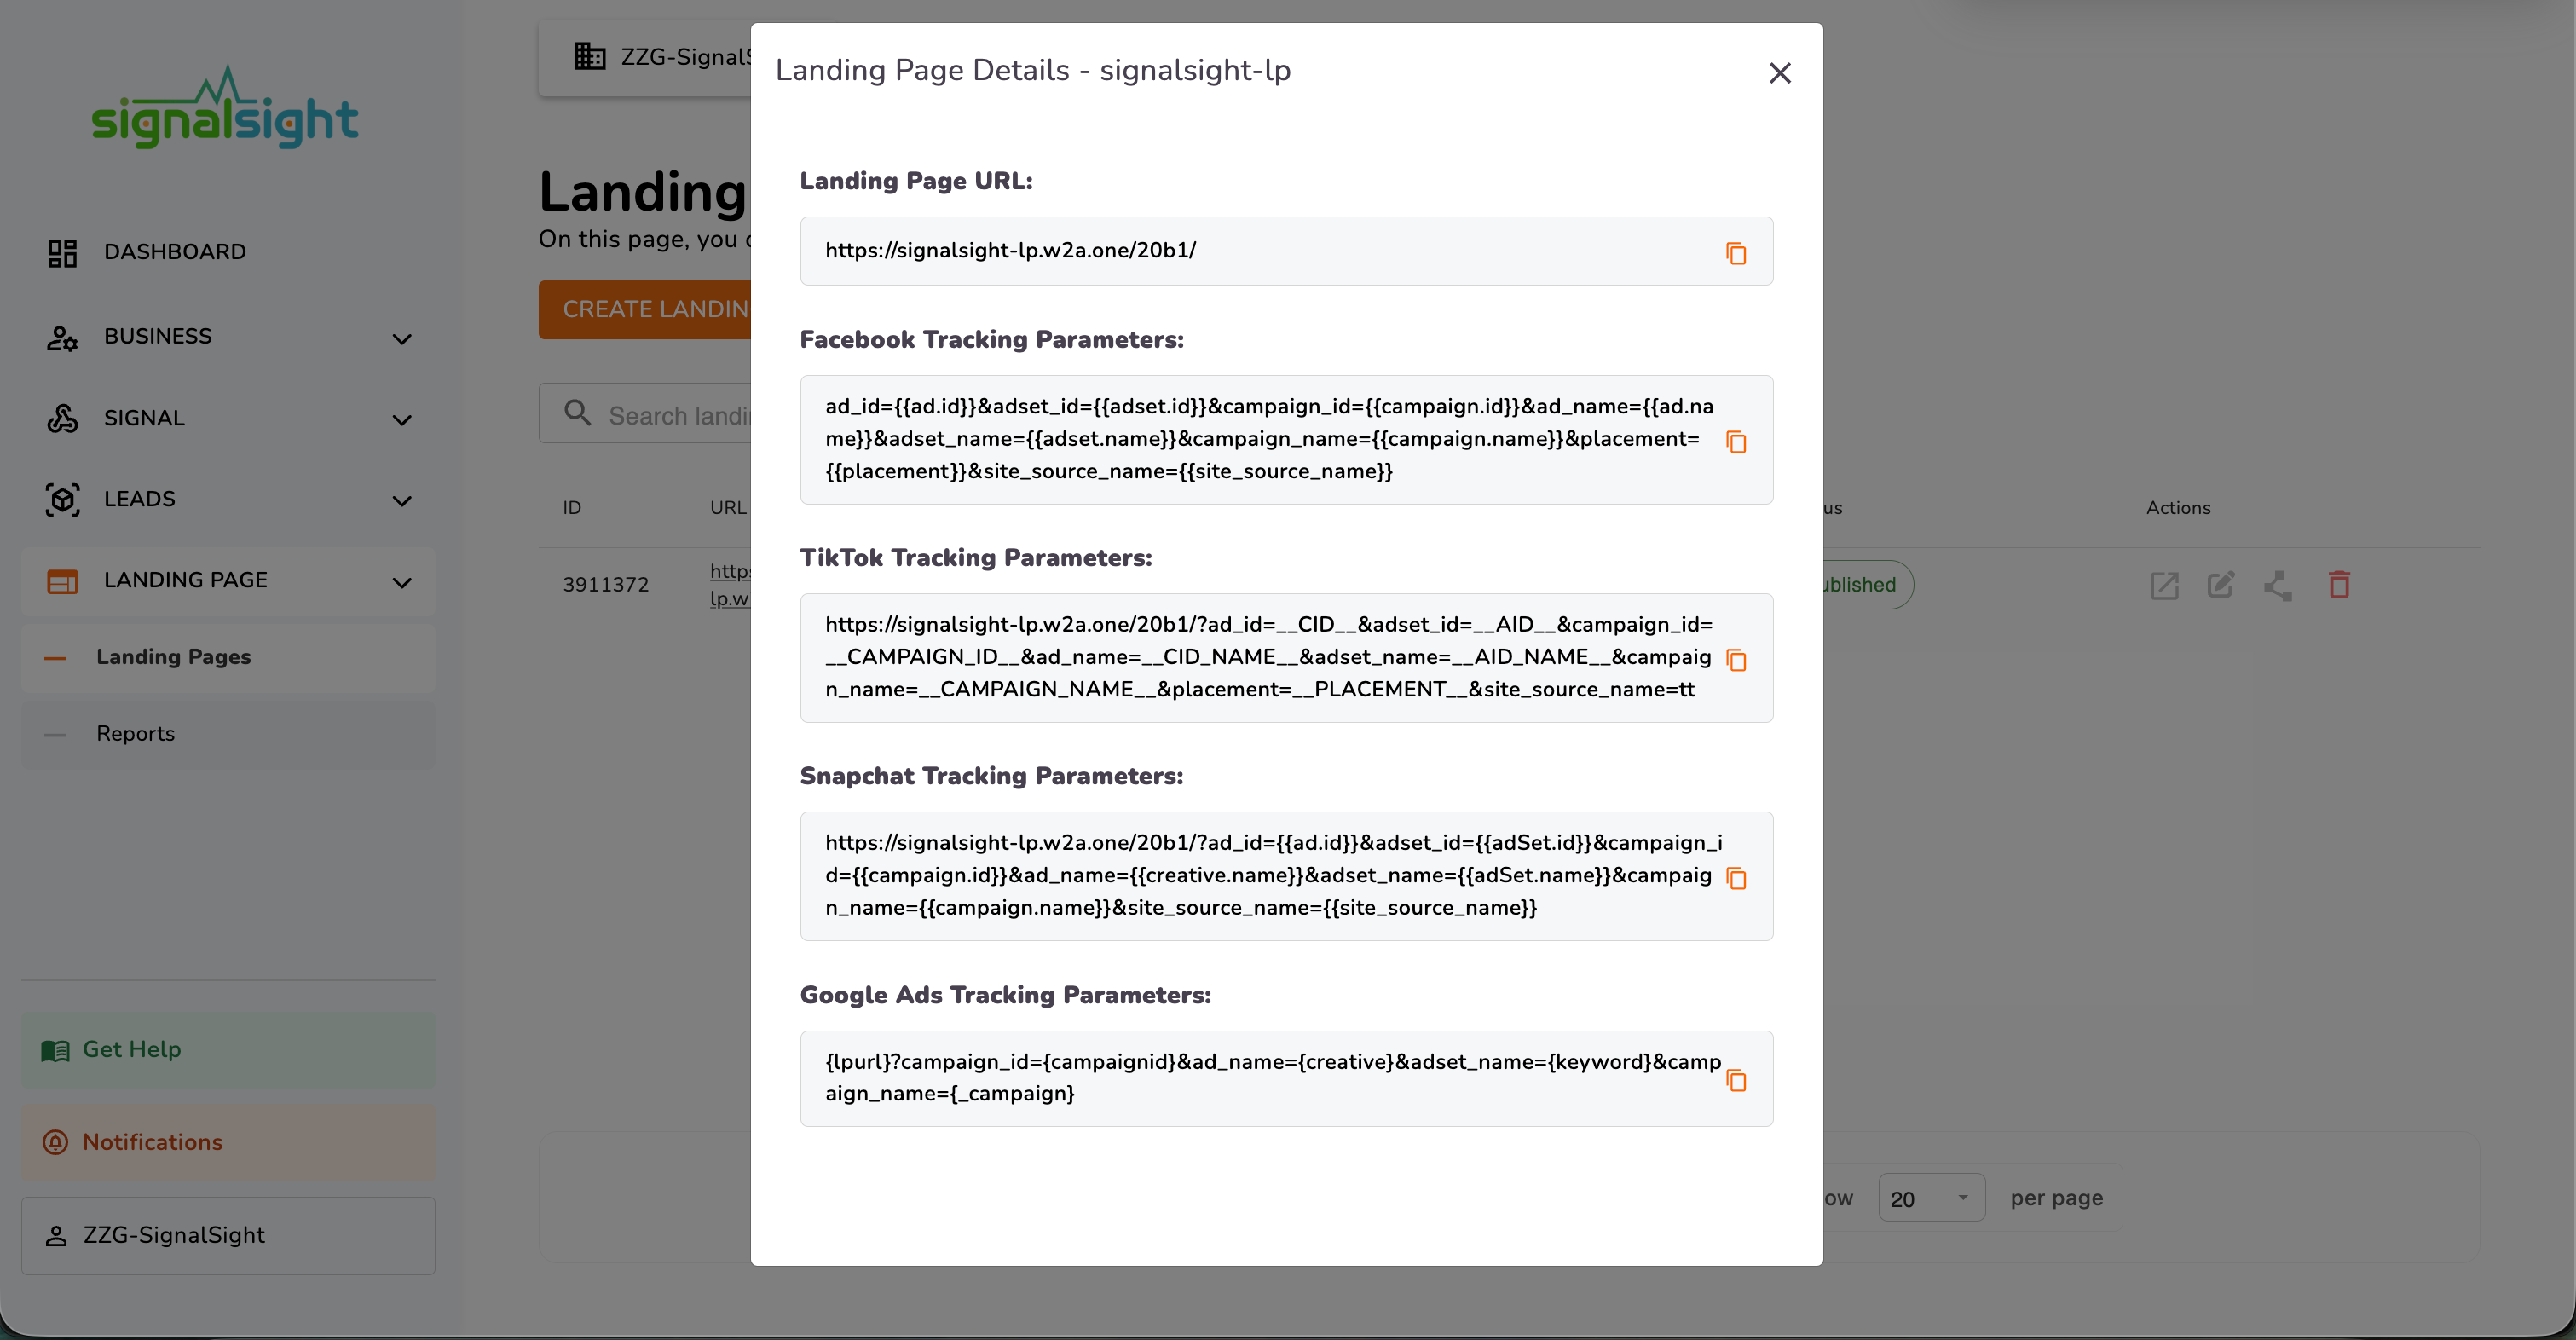
After publishing, a Landing Page Details modal opens with everything you need for your ad campaigns:
- Landing Page URL: The base URL to use in your ads.
- Facebook Tracking Parameters: Dynamic URL parameters for Meta Ads (
{{ad.id}},{{campaign.id}}, etc.). - TikTok Tracking Parameters: Full URL with TikTok macros (
__CID__,__CAMPAIGN_ID__, etc.). - Snapchat Tracking Parameters: URL with Snapchat dynamic parameters.
- Google Ads Tracking Parameters: Tracking template for Google Ads campaigns.
Click the copy icon next to each field and paste the value into the corresponding field in your ad platform. For Web2App campaign setup details, see the Adjust or AppsFlyer guide.
Step 9: Edit & Manage
You can return to any landing page from the Landing Pages list and click the edit icon. The Overview tab shows your tracking URLs alongside a live mobile preview — useful when you need to copy a URL again or verify the page before a campaign goes live. Use Continue to step through and update individual sections without changing the published URL.
Frequently Asked Questions
Do I need a tracker before creating a landing page?
Yes. You select the tracker during the Connections step of the wizard. Create your tracker first so it appears in the dropdown.
Can I edit a landing page after it's published?
Yes. Open the landing page from the Landing Pages list and click edit. The URL stays the same — only the content changes.
Where do I get the TikTok or Meta tracking URL?
After publishing, the Landing Page Details modal shows channel-specific URLs. You can also find them anytime by opening the landing page editor and going to the Overview tab.
Do I need to configure the paywall step?
Only if your landing page sells a paid product or subscription. For standard free app install campaigns, leave Paywall Integration disabled and click Save & Continue.